Adding Borders to Images in Squarespace: No‑Code and CSS Options
A simple border can make your images look more professional and well-designed. Squarespace 7.1 offers two good ways to add borders: a no-code option using Shape blocks in Fluid Engine, and a CSS option that works well across different pages and image types. I'll explain both methods, help you decide which one to use, and share tips to make your images look good on mobile devices.
Option 1: No‑code (Shape block “frame”)
Best for one‑off moments where you want a quick, on‑brand frame without touching CSS.
How to do it:
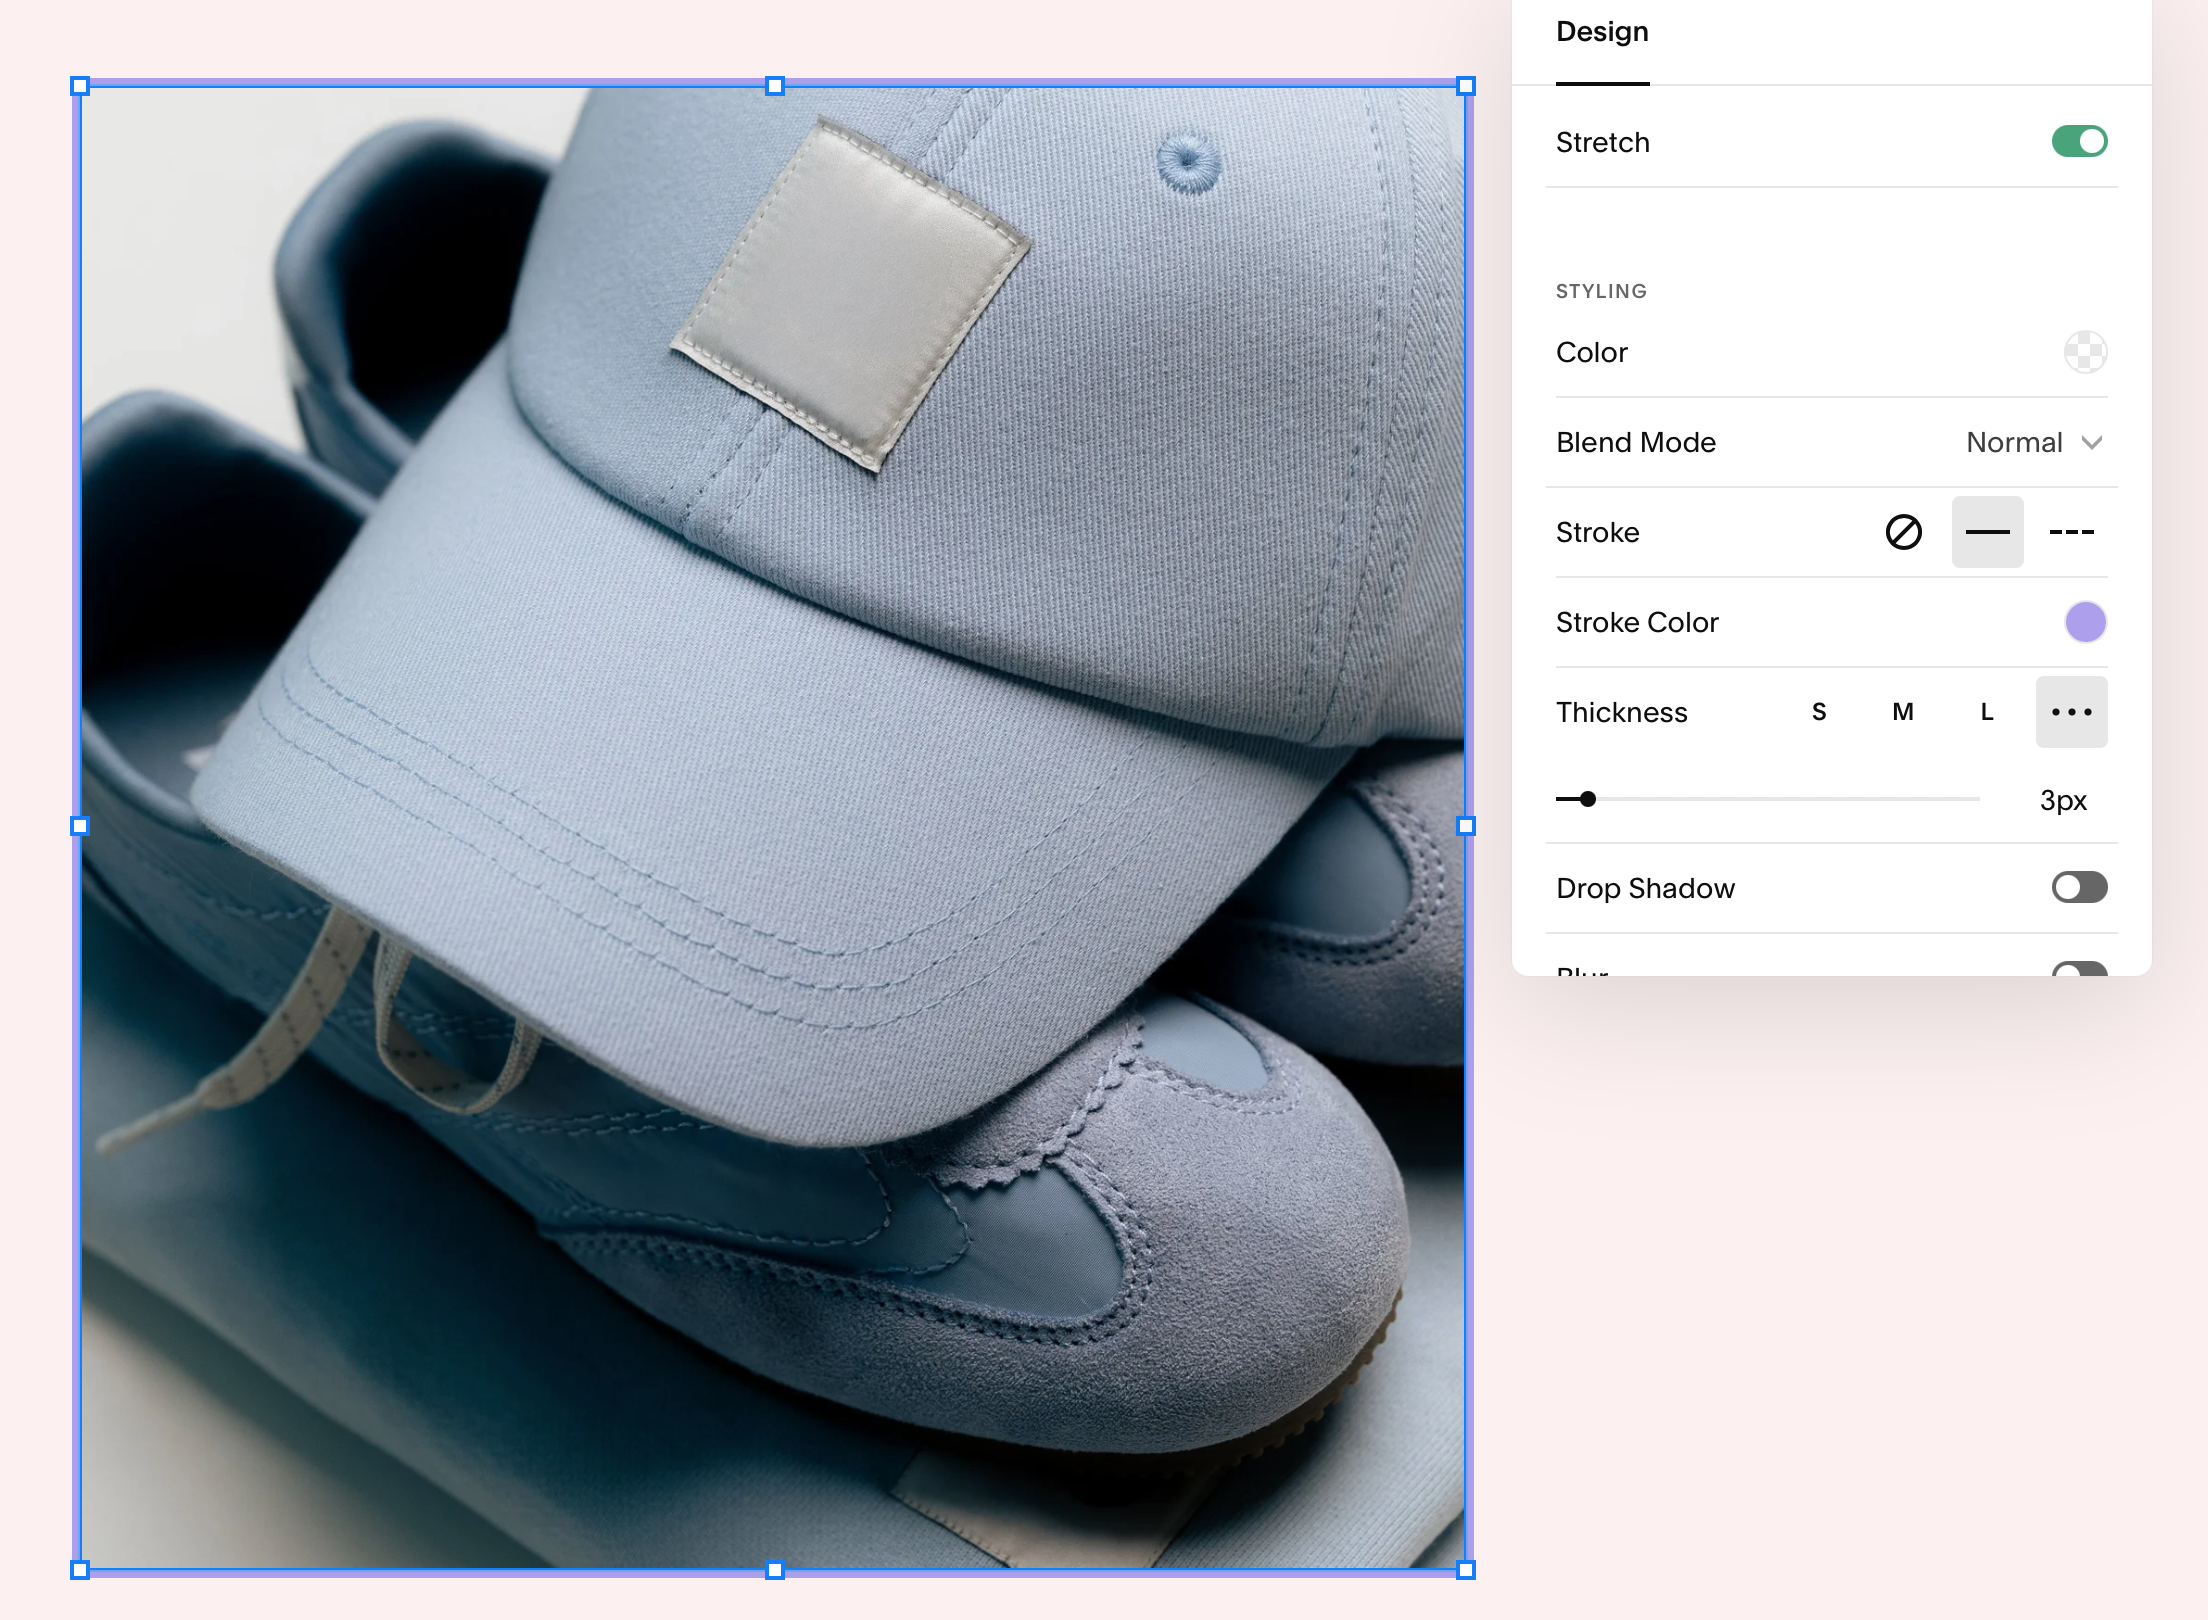
Add your Image block and set Design to Fill for predictable sizing.
Add a Shape block and resize it to match the image’s dimensions.
In Shape settings, set Stroke to control border thickness and choose a colour that fits your palette.
Send the Shape block behind the image using layer controls.
Switch to Mobile view and adjust sizing and position so everything aligns.
Why it works:
Totally visual workflow, great for hero sections and feature images.
No code handoff required.
Trade offs:
Images need to stay square or rectangle.
Not ideal if you need consistent borders across lots of images.
Pro tips:
Keep border thickness consistent within a section for cohesion.
Use subtle strokes on busy pages and slightly thicker strokes for minimalist layouts.
Remember to preview on mobile and tablet.
Or you can hide the border on mobile/tablet by making it smaller and place it behind the image.
Option 2: CSS (for designers who want more precise control)
If you want to apply borders consistently to one image, a whole section, a page, or site‑wide, CSS is your best friend. In Fluid Engine, borders are most reliable when the image is set to Fill.
Prep:
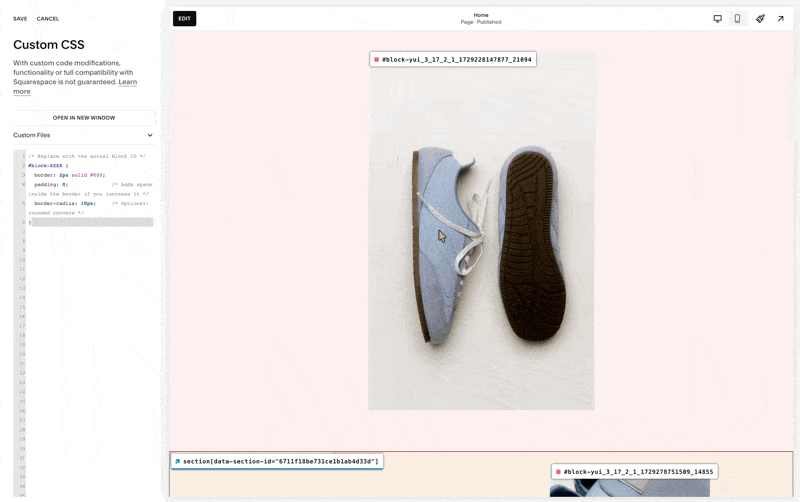
Install a Block ID finder extension (Squarespace ID Finder) so you can target specific images.
Use Fill for image blocks when possible to avoid unexpected cropping.
A) One image only (Block ID)
Use this when you want a border on a single image.
/* Replace with the actual Block ID */
#block-XXXX {
  border: 2px solid #000;
  padding: 0;              /* Adds space inside the border if you increase it */
  border-radius: 0px;     /* Optional: rounded corners */
}
B) All images on a page or section
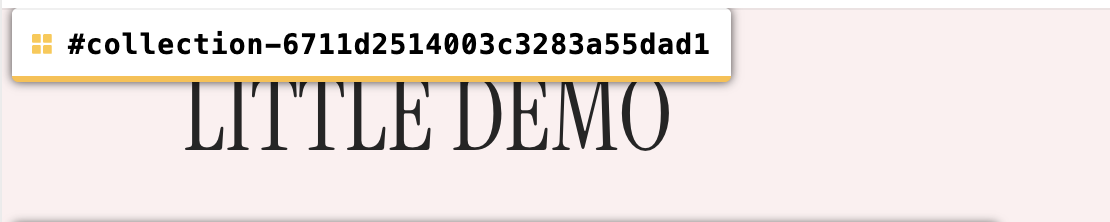
Scope by page (collection) or section for consistent styling without affecting the whole site.
#collection-XXXX .sqs-block-image {
  border: 1px solid currentColor;
  padding: 8px; /* Adjust accordingly */
}
section
section[data-section-id="XXXX"] .sqs-block-image {
  border: 1px solid #000;
}
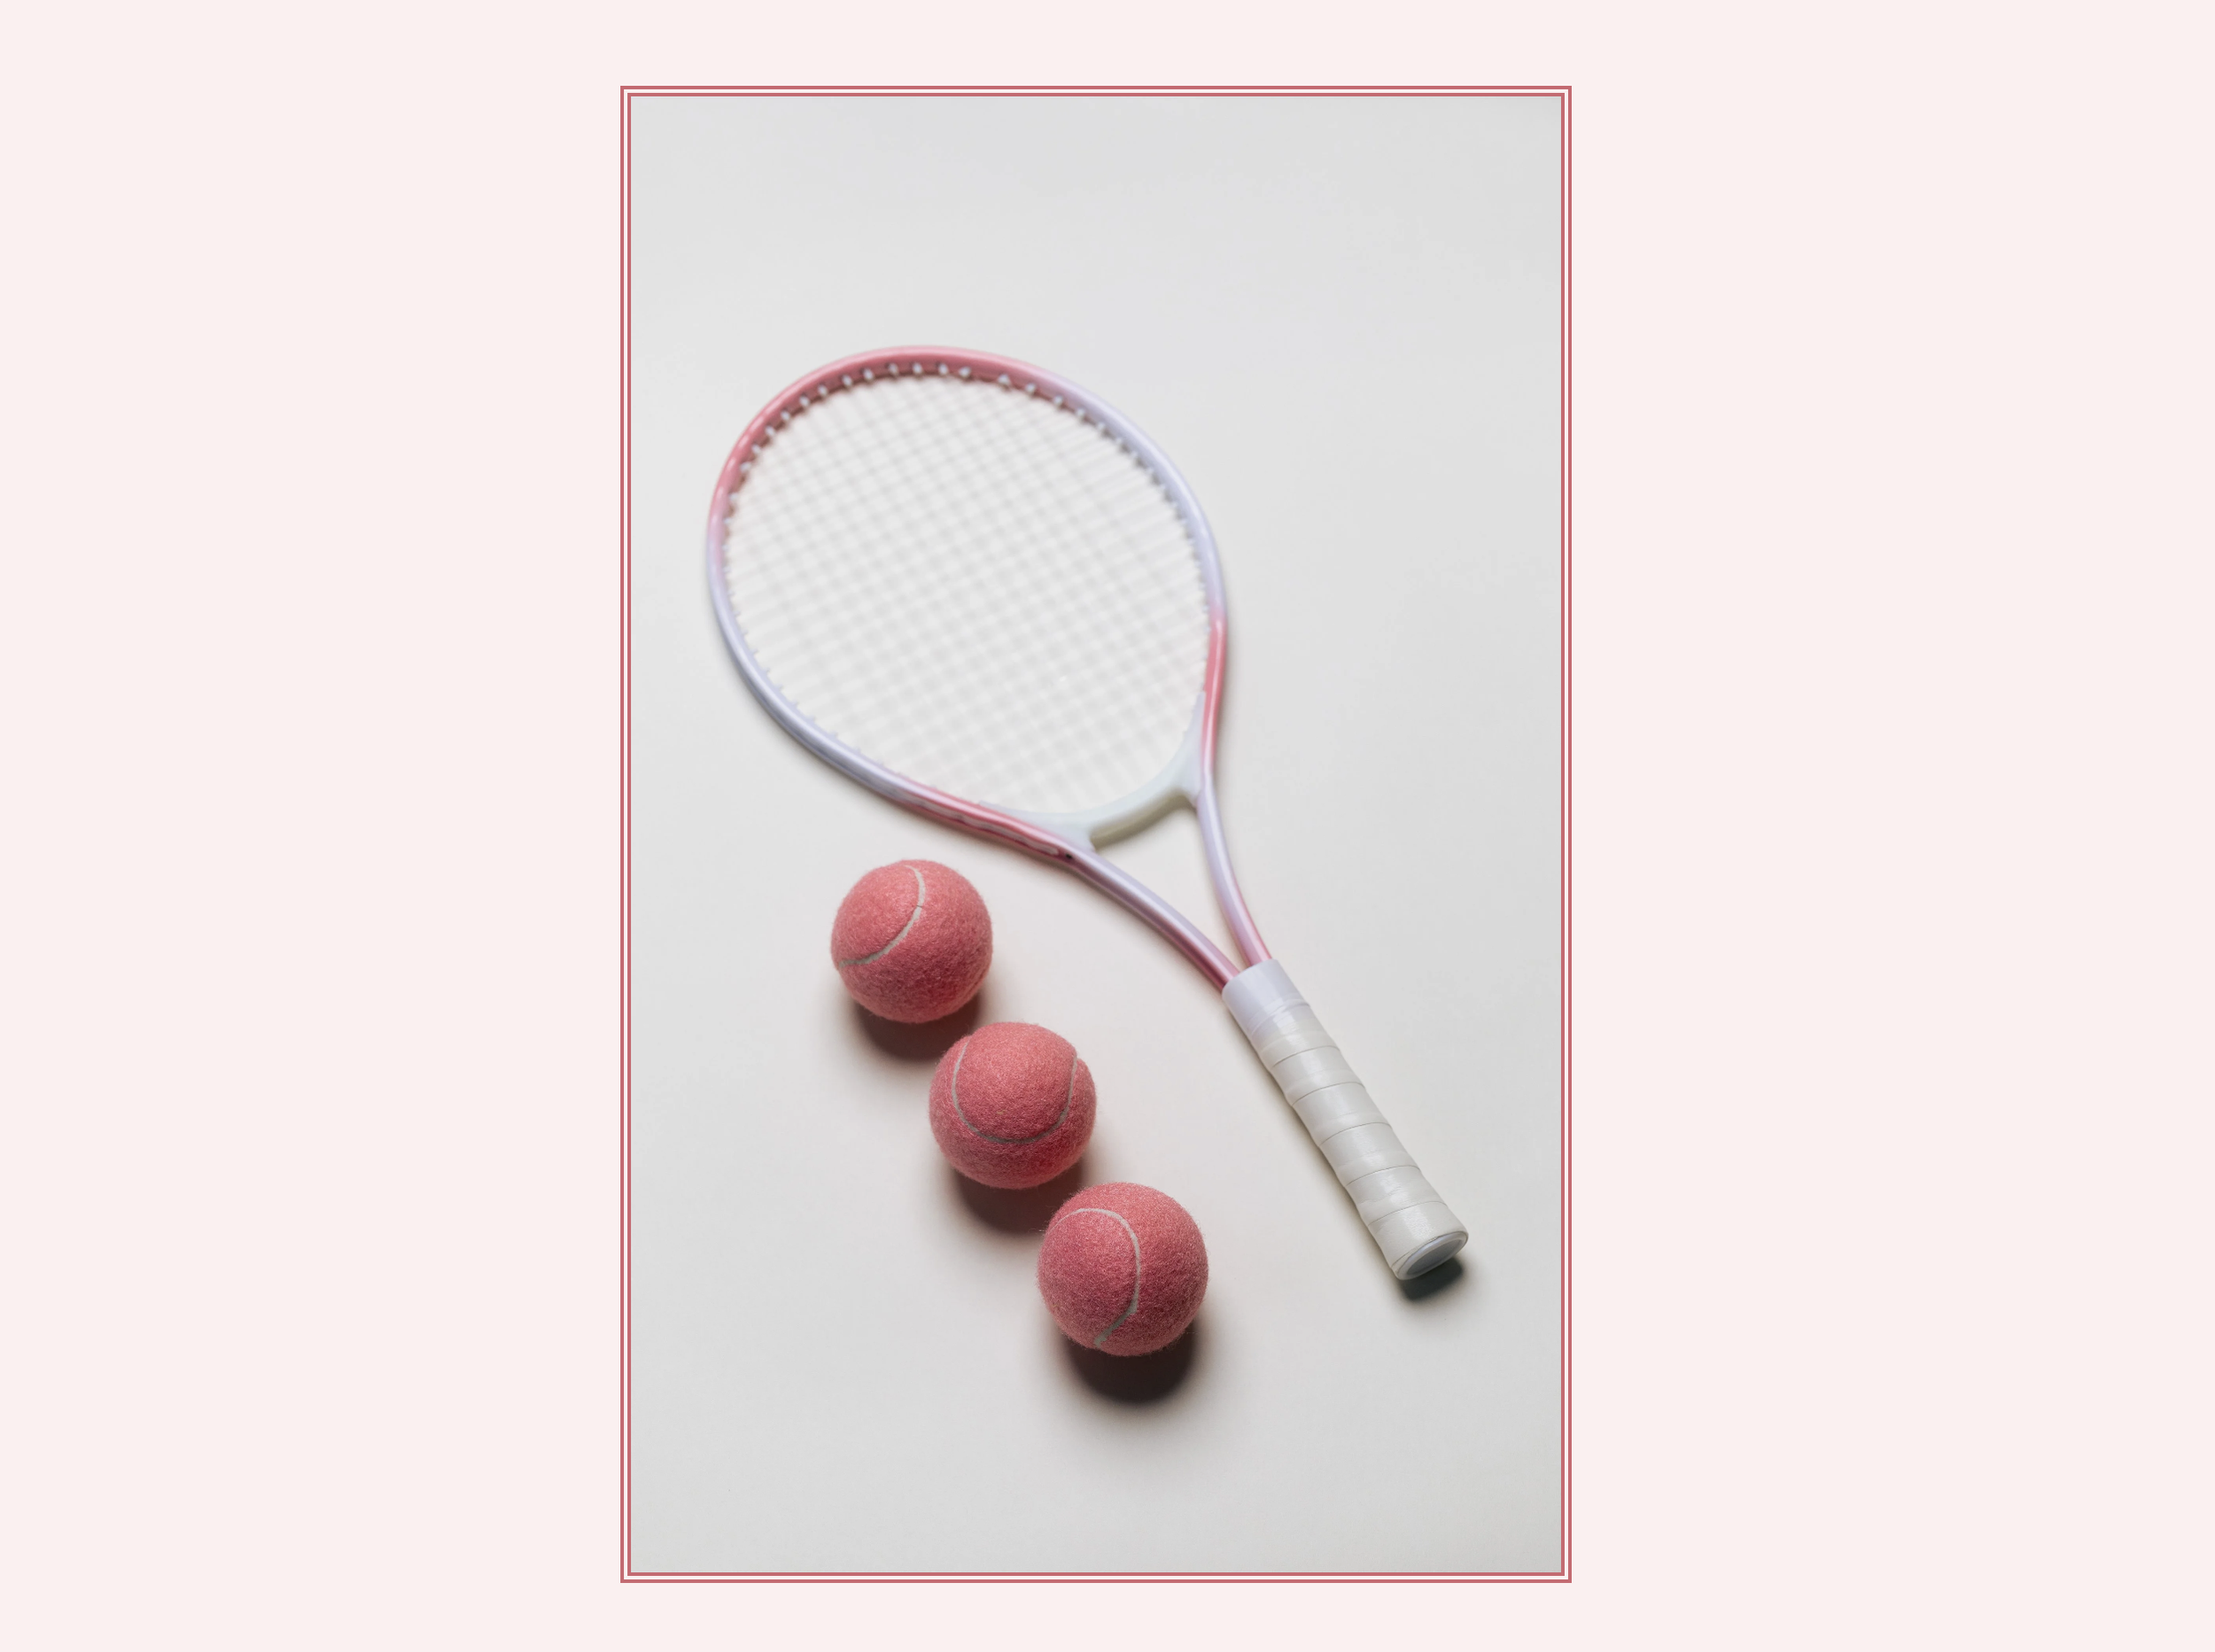
C) Some Fun Variations to elevate the look
Offset “editorial” sitewide:
.sqs-block-image {
  border: 1px solid currentColor; /* Replace with your hex color */
  padding: 10px;
  box-shadow: 10px 10px currentColor; /* Offset frame effect */
}
Notes
Adjust border thickness, colour, and radius to match your brand. Add a little padding for an “inner mat” look.
Page‑level (replace with your page’s collection ID)

Section‑level (replace with the section ID)
Offset “editorial” one specific image only:
Offset “editorial” one specific image only:

Double border:
#block-XXXX {
  border: 6px double currentColor; /* Replace with your hex color */
}
Dashed Border:
#block-XXXX {
  border: 3px dashed currentColor; /* Replace with your hex color */
}
D) Special cases: Summary, Blog, and Product images
These special parts of Squarespace (like blogs and product listings) have their own styling. Here are some simple code examples to start with:
/* Summary block thumbnails */
.summary-thumbnail {
  border: 1.5px solid #000;
  border-radius: 24px; /* Optional */
}

/* Blog list/item thumbnails */
.blog-item a.image-wrapper {
  border: 1.5px solid #000;
  border-radius: 24px;
}

/* Product gallery (item page) */
.ProductItem-gallery {
  border: 1.5px solid #000;
  border-radius: 24px;
}

/* Product thumbnails */
img.ProductItem-gallery-thumbnails-item-image {
  border: 1.5px solid #000;
  border-radius: 12px;
}
Which method should you use?
One image and no code? Use the Shape block “frame.”
A handful of images in one section or page? Use section or page CSS scoping.
Consistent look across many pages? Use site‑wide CSS with thoughtful exclusions.
Lists and commerce items? Target Summary/Blog/Product selectors.
Accessibility and SEO
Borders are decorative - keep your image alt text descriptive and context‑aware.
Maintain sufficient colour contrast if borders are used as interactive affordances.
Troubleshooting
Border looks misaligned: Ensure the image uses Fill and review padding and border‑radius.
Layout shifts when adding borders: Add
box-sizing: border-box;to your target selector.Global styles touching logos: Scope your CSS to pages, sections, or specific blocks instead of site‑wide.
Quick takeaway: Use Shape blocks for quick, manual frames you can tweak visually. Use CSS when you want control, consistency, and scalability. Start scoped, then expand only if you truly need a global style.
By the way, I'm a website designer specialising in Squarespace sites for small businesses. If you need help implementing any of these techniques or want a custom solution for your site, feel free to reach out. I offer website templates and complete site builds.